How to assign a separate shortcut to a particular refactoring
Note, this article has been moved to the official DevExpress Support Center site. Please refer to the moved article as it might have further updates or additional comments. Thank you.
It can be easily accomplished from the Shortcuts options page in the Options Dialog. Follow these steps to get to the Shortcuts options page:
1. From the DevExpress menu, select Options…
2. In the tree view on the left, navigate to this folder: IDE.
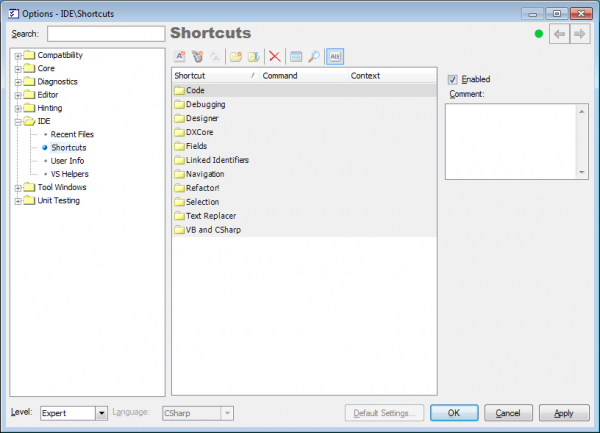
3. Select the Shortcuts options page. Here it is:
To create a Shortcut:
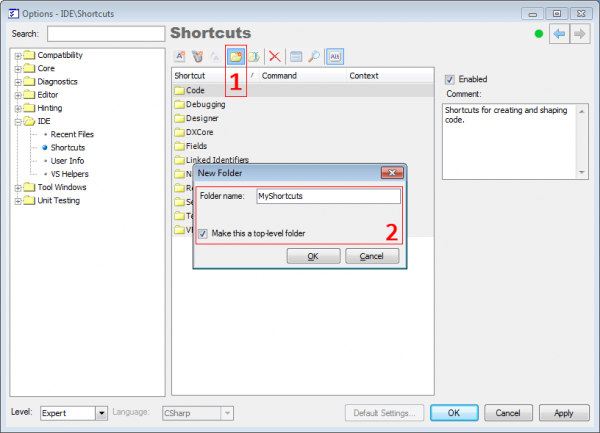
1. Create a new folder by clicking the New Folder button.
2. Enter a folder name, e.g. “MyShortcuts” and check the “Make this a top-level folder” check box:
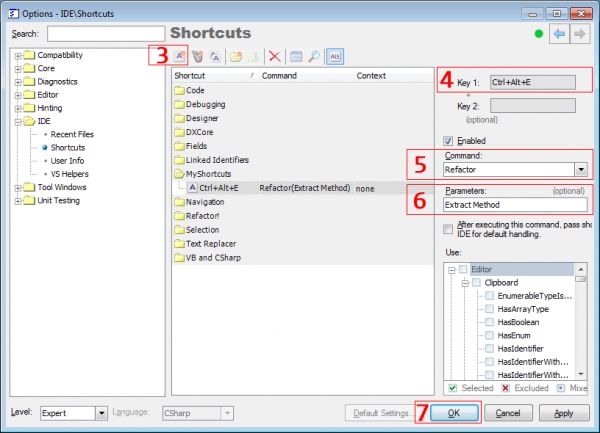
3. Click the “New Keyboard Shortcut” button.
4. Enter a key for this shortcut into the “Key 1” text box (and into the “Key 2” text box if necessary).
5. Select “Refactor” from the Command combo box.
6. Enter the name of the particular refactoring in the Parameters text box. A valid name can be seen in the Catalog options page (Editor | Refactoring | Catalog).
7. Click OK to save your settings.
The shortcut has been created. Now the refactoring specified in the Parameters (“Extract Method“) text box will be applied after pressing the shortcut key (CTRL+ALT+E in this example).
—– Products: Refactor! Pro and free editions of Refactor! Versions: all VS IDEs: any Updated: Aug/22/2012 ID: T025

